Saturday, June 9, 2012

RED BERRY DESSERT - ROTE GRÜTZE


Hier geht's zur deutschen Version dieses Posts


Hot summer days and ripening berries are a sure sign of "Rote Grütze" coming up on my culinary horizon. Rote Grütze (literally translated "red gruel"- sounds awful, I know!) is a fruity, refreshingly tangy dessert, made of at least two (but better more) kinds of red berries. One should be tart, like raspberries, sour cherries, or red or black currants. The others can be strawberries, sweet cherries, blueberries, blackberries - the last two I consider honorary red berries.

Rote Grütze is a traditional dessert of Northern Germany and Denmark (where it's called Røde Grøde). In summer you'll find it on the menu of many restaurants, and every housewife in Hamburg or Esbjerg will serve it to her family, surrounded by whipped or liquid cream, vanilla sauce or vanilla ice cream.

Originally a Northern specialty, Rote Grütze became so popular that it slowly made its way further down to the South. Even conservative Bavarians - who usually poo-poo everything beyond the "weisswurst equator" - don't seem to shun this "Prussian" intruder.

Unfortunately I can't get red or black currants here in Maine - they might harbor a bug that is harmful to white firs. And fresh sour cherries are hard to find, too, only at Trader Joe's or Whole Foods, in Portland.

Therefore I like using a frozen berry mixture, adding fresh berries from the supermarket or street vendors. The use of vanilla pudding powder instead of starch is, also, very convenient. Your thickener comes prepackaged and pre-flavored.

My version is as easy to make as it tastes good. When we have a summer party, it's always a great hit with our guests, we have never any leftovers!

Ingredients:
1 package vanilla pudding powder*)
3 tbsp. cold water
500 g mixed berries, fresh or frozen (reserve 1/4 cup to add later)
3-4 tbsp. sugar, depending on tartness of berries
2-3 tbsp. Creme de Cassis (black currant liqueur), or other fruity liqueur (optional)

*) Some pudding powders are not sweetened, and some have to be dissolved in hot liquid. In those cases, add more sugar to taste, and mix with hot water. But don't add the milk as per package instructions - you are making Rote Grütze, not regular vanilla pudding!

How to make:
In a small bowl, stir together pudding powder with water, until dissolved and smooth.

In a saucepan, stir together frozen berries with sugar and thaw on low heat. Add fresh berries (except for the 1/4 cup to add later,) and stir until combined.

Add dissolved vanilla pudding powder in a steady stream, stirring constantly. Bring to a boil, stirring frequently. Reduce heat to low, and let simmer, stirring frequently until berry mixture thickens (that doesn't take very long.)

Remove from heat, and stir in remaining fresh berries and Creme de Cassis (if using). Pour into glass bowl. Let cool down to room temperature, then refrigerate until chilled.

Serve with cream, vanilla ice cream or vanilla sauce.

Tip:
If you don't like seeds in the dessert - and don't mind the extra work - puree and strain berries before adding the pudding powder.

Tuesday, June 5, 2012

BRIOCHE BREAD - BRAIDED INTO SUBMISSION


Our ABC challenge for June was "Brioche Bread" - we bake our merry way through Abby Dodge's wonderful book: "The Weekend Baker". I was quite pleased with Hanaâ's choice (she is the instigator of this challenge), because I like brioches.

My last memory of this buttery pleasure was my daughter's graduation from the New England Culinary Institute. I swear there was never a graduation with better food than at the Trapp Family Lodge in Vermont.

I had made brioches twice before, one from a German baking book - hard work, kneading the butter into the dough (my hands hurt!) but great taste. The second one an easier recipe from Peter Reinhart, less rich, but, unfortunately, also less satisfying.

Following Abby's do-ahead suggestion, I mixed the dough in the evening, before putting it to sleep  in the fridge.

Due to my inexperience with this particular kind of dough - my two earlier bakes were a long time ago - I was a bit leery about over-mixing. When, after the required kneading time, the dough did not pull away from the bottom of the bowl, I gave it a few more minutes, and then started feeding it with butter, no matter what.

Even though I had already cut the butter in 16 (instead of 8) pieces, I found that it took quite long for them to be absorbed into the dough. The dough got warmer and warmer - and I got cold feet!

When the temperature reached over 90ºF, visions of dying yeast cells caused me to rip the bowl from under the dough hook, taking it to a safe, cooler place. It was smooth, but still sticky, so I applied two stretches and folds, with a 10 minute break, before placing it in the refrigerator.

Overnight the dough had risen mightily, and would have busted the lid, if that had been less tight. After giving it an hour to warm up a bit, I started with the shaping process. But this dough didn't play by the recipe's rules, it clung to every surface it could reach.

With oiled hands and bench, I forced it finally into submission, rolling it into shaggy strands (where was the promised smoothness?), braiding it into a halfway decent plait, and sprinkling it with chopped hazelnuts to give it a bit of crunch.

As if nothing had happened, my loaf rose nicely, and looked quite pretty, when it came out of the oven.The crust had a nice, nutty crunchiness, and the crumb was soft and rich.


And the taste? Maybe I'm spoiled by my memories, and the subtle orange blossom flavor of the Mexican "Pan de Muerto" I just made.

Abby's "Brioche Bread" is a nice loaf, mild, neither too rich, nor too sweet - but will not make it into my most memorable Bread Hall of Fame.

Sunday, June 3, 2012

MUESLI ROLLS

Muesli Rolls
 Hier geht's zur deutschen Version dieses Posts


A while ago I admitted neglecting some of my baking books, never giving them a second look, while shamelessly favoring others.

To atone for my neglect, I pledged to give every book a fair chance with my "Equal Opportunity Baking" list, with one recipe from ALL of my baking books.

Published in 1997, I use "Brot und Kleingebäck" mainly as resource, adapting the old, labor intensive methods to more modern techniques that require less brawn and hands-on work, thanks to longer fermentation and refrigerator sleepovers.

Interesting recipes but old techniques
These little (or no)-knead methods, described by Peter Reinhart, Jim Lahey, and others, are much easier to work with. And not only that, they also improve the taste.

I started the evening before, kneading the dough, then let it slowly rise overnight in the fridge. The next morning I baked my rolls. When they came out of the oven, they looked - and smelled - very appetizing.

I couldn't wait to have my first bite, but what a disappointment - I found that "the proof was in the Muesli Rolls". They tasted good, yes, but were much too dry!

How could that happen? My dough had been well hydrated the night before, even a little bit sticky, as it should be with stretch-and-fold doughs.

I really liked the taste of the rolls, otherwise I would have written off the recipe with a scribbled comment: "not that great!" Therefore, I took on the recipe again to find out what had caused this lack of moisture.

Was it the different fat content of German "saure Sahne" and American sour cream (10% vs 12-16%?) Not likely: more fat will make the crumb softer, but not drier.

Saure Sahne or sour cream - here it didn't matter
American molasses instead of German sugar beet syrup? Nope! And my baking friend Paul only recommend adding more water, when I asked for his advice.

But there was one ingredient that had puzzled me from the beginning - the unspecified "hearty muesli mix". There are many muesli mixes on the market, and they differ in their composition from one brand to the other.

I looked at the list of ingredients on the package. Bob's Red Mill's "Old Country Style Muesli" had 5 different flakes, dates, raisins, flax seed, sunflower seeds, almonds, and walnuts.

The stretch-and-fold method doesn't require pre-doughs (except for sourdough breads, of course). Usually the whole grains and seeds have enough time to soak when they spend the night in the fridge.

But I find that pre-soaking coarser ingredients doesn't hurt. And whole flax seed I always soak for 24 hours, anyway - to make them better digestible.

This is the culprit!
Even though my dough seemed well hydrated after the stretch-and-fold procedure, those flakes, seeds and dried fruits had swallowed a lot of water overnight.

The original recipe mentions overnight refrigeration as a do-ahead option, too, but without the muesli mixture. That should be kneaded into the dough before baking.

With just 10 minutes (!) rising time for the shaped rolls, the flakes and dried fruits have no time to absorb much liquid, and the original recipe requires - except for the sour cream - only 5-6 tablespoons water!

But what to do? I like chewing on nuts, yes, but on hard pieces of dried fruit? No, thanks!

In a comment, the recipe suggests using a mixture of oatmeal, raisins and hazelnuts, instead of store bought muesli. And that's exactly what I did when I made the rolls again - to have better control over the hydration.

Since a ready muesli mixture also contains sugar, I added a bit of honey. These whole wheat rolls should be slightly sweet.

I hoped these tweaks would work, and I wasn't disappointed - the second batch of muesli rolls turned out just as nice as they looked!


MUESLI ROLLS  (10 - 12))

Soaker
65 g old fashioned rolled oats
20 g golden raisins
100 g water

Dough:
400 g whole wheat flour
185 g soaker (all)
250 g sour cream or Greek yogurt, lukewarm
12 g instant yeast
45 g/2 tbsp molasses
10 g honey (or more, to taste)
1 large egg
6 g salt
5 crushed coriander seeds
½ tsp ground cinnamon
20 g toasted hazelnuts, coarsely chopped
egg white, mixed with a bit water (for glazing)
20 g hazelnuts, finely chopped (for topping)

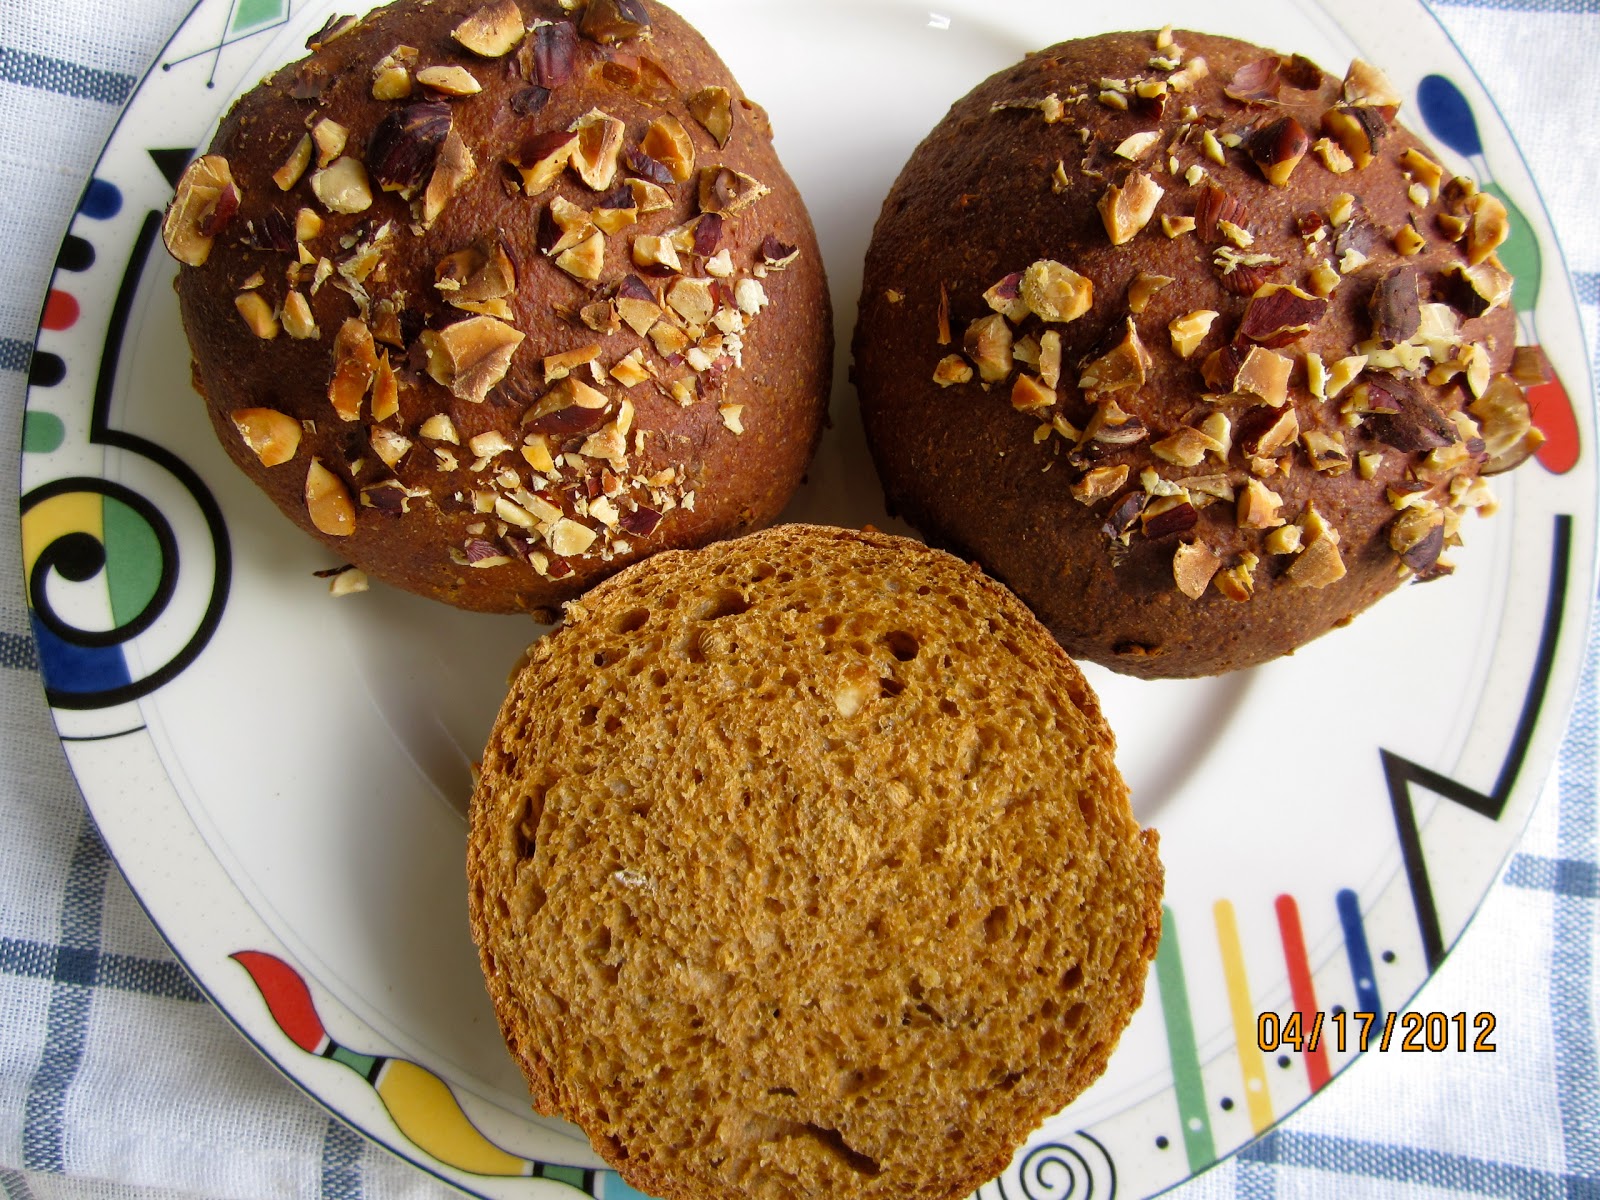
The homemade muesli mix worked!

DAY 1:
In the morning, stir together all soaker ingredients. Cover, and leave at room temperature.

In the evening, mix together with all dough ingredients at low speed (or with wooden spoon), until all flour is hydrated, and rough ball forms. Let dough rest for 5 minutes.

Knead at medium-low speed (or with hand) for 2 minutes, adjusting with a little more water, if needed. (Dough should be somewhat sticky.) Resume kneading for another 4 minutes. (Dough should still be a bit sticky.)

Transfer dough to a lightly wet or oiled work surface. With wet or oiled hands, stretch or pat dough into a rough square. Fold like business letter in 3 parts, then repeat the same folds from the left and right side.

Pick up dough ball, gathering edges underneath, and place, seam side down in lightly oiled bowl. Cover, and let rest for 10 minutes. Repeat this stretching and folding 3 times more, at 10 minute intervals. After the last fold, place dough in oiled bowl or container, cover, and refrigerate overnight.

Ready for baking

DAY 2:
Divide cold dough*) into 10 - 12 equal pieces. Shape rolls, or torpedoes, and place them, smooth side up, on parchment lined baking sheet (I like using a perforated baking sheet). Place hazelnut pieces for topping on a plate.

Brush rolls with egg wash, and dip in hazelnuts. Gently press nuts down, so that they stick. Let proof 45 - 60 minutes, or until rolls have grown 1 1/2 times their original size, and a dimple, poked with your finger, doesn't fill up again.

Preheat oven to 400ºF/200ºC. Bake rolls for 12 minutes, rotate 180 degrees, and continue baking for about 13 minutes more, until they are deep golden brown.

Let rolls cool on wire rack.

*)  With rolls it is not necessary to let them come to room temperature before shaping. They warm up fast.


 Submitted to Yeast Spotting

Updated 12/28/13

Friday, June 1, 2012

MY PANTRY - VANILLA FLAVORS

Three vanilla flavors

Hier geht's zur deutschen Version dieses Posts


In 1891 August Oetker, a young pharmacist from Bielefeld, Germany, came up with the formula for a new kind of baking powder. 

Whereas the original baking powder, invented 35 years earlier, could not be stored, and, worse, had an odd aftertaste, the new "Backin" had a much longer shelf life and tasted neutral.

Dr. Oetker, not resting on his pharmaceutical laurels, was also a marketing genius. Instead of filling his mixture in tin cans, or card board boxes, like everybody else, he sold it in small packets - not to professional bakers, but to housewives - a portion just enough for 500 g flour, or one cake!

Making it much more convenient for mothers to bake for their families, he also found new ways to advertize. With recipes printed on the packets, and in his newspaper ads, he tempted them to bake even more - of course with his practical "Backin".

Being so successful with baking powder, the smart pharmacist created a whole line of baking products, packaging every item in small sachets or tiny glass tubes. No need for measuring, or eyeballing, but ready to use in most regular sized cakes or other baked goods.

Because of this clever marketing strategy, planned in the back room of a pharmacy in Bielefeld, German housewives are used to buy vanilla aroma in 1-portion packets, mixed with sugar for easier distribution. Vanilla extract, like in the US, is rarely to find in German baking aisles.

Dr. Oetker's original vanilla flavor - the one that I, and most Germans, grew up with - is an artificial aroma. Meanwhile, you can get a natural flavor, too: "Bourbon-Vanille".

In specialty stores for cooks, like my favorite "Rooster Brother" in Ellsworth, you can also buy vanilla bean paste. This tastes like scraped vanilla beans, but it is rather expensive, and cannot be stored for long - it gets hard.

But why buy vanilla extract or sugar, when both is very easy to make!


HOMEMADE VANILLA EXTRACT (adapted from "Cook's Illustrated")

1 vanilla bean
6 oz/180 ml hot vodka (like Smirnoff - it doesn't have to be an expensive brand)

Split vanilla bean lengthwise and scrape it. Place empty pod and its contents in empty jam glass or another 1-cup container with lid. Pour hot vodka over vanilla, and let it cool to room temperature, then close the lid.

Let mixture stand for 1 week at room temperature, shaking the glass gently every day. 

Strain the vanilla extract (optional), and store it in a dark, cool place. It will keep indefinitely.


HOMEMADE VANILLA SUGAR (VANILLEZUCKER)

You don't even have to buy vanilla beans extra for that purpose. Whenever you use a vanilla bean, place the scraped pod into an empty jam glass, or another 1-cup container with lid, and fill it up with sugar.

After a few days the sugar will be infused with vanilla aroma. This will keep indefinitely, you can always add more vanilla beans and more sugar.


VANILLA EQUIVALENTS:

1 tsp vanilla extract         =      1 packet/2 tsp/8 g vanilla sugar ("Vanillezucker")                                                                       =     1 vanilla bean (2-inch/5 cm)
1 tsp. vanilla extract        =     1 tsp vanilla bean paste


STORING VANILLA 

Vanilla extract and vanilla sugar - homemade or store bought - can keep forever, stored in a cool, dark place.

Vanilla bean paste, stored in a cool and dark place, keeps several months, but gets hard eventually.

"Cook's Illustrated" tested different ways to how to store vanilla beans - they keep best if they are wrapped in plastic foil, and placed in a freezer bag in the vegetable drawer of the fridge (1 month or longer).


VANILLA BEAN RESCUE:

Dry and hard vanilla beans are very difficult to scrape. They can be rescued by placing them in a small bowl, covering them with whipping cream or half-and-half, and microwaving them for 1 - 2 minutes.

After this hot spa treatment, the pod are plump and pliable again, and can be easily scraped. And you have some nice, vanilla flavored cream as additional benefit, too. (This tip came from one of "Cook's Illustrated" readers.)